

Making candles can be a fun and relaxing hobby for anyone. However, expenses like wicks can add up. If you’re anything like me, I’m sure you’ve looked at candle wicks and wondered how hard they are to make. The answer is, it can be very simple to make your own wicks.
Read on to learn how to make candle wicks with our simple tutorial and tips. Make sure you read this article fully before you start!
What is Candle Wicks Made of?
Before we get into how to make a candle wick, you should know what commercial candle wicks are made from so you know what your options are.
Most wicks are made of cotton. You can find round wicks that need to be trimmed or flat braided wicks that are meant to curl back as they burn so you don’t need to worry about trimming.
Wicks that will be in candles poured into containers like tealights or votives need an anchor at the bottom so they won’t float to the top of the liquid wax. Floating candles also need a seal on the bottom of the wick as well as an anchor since the wick can soak up water and stop burning.
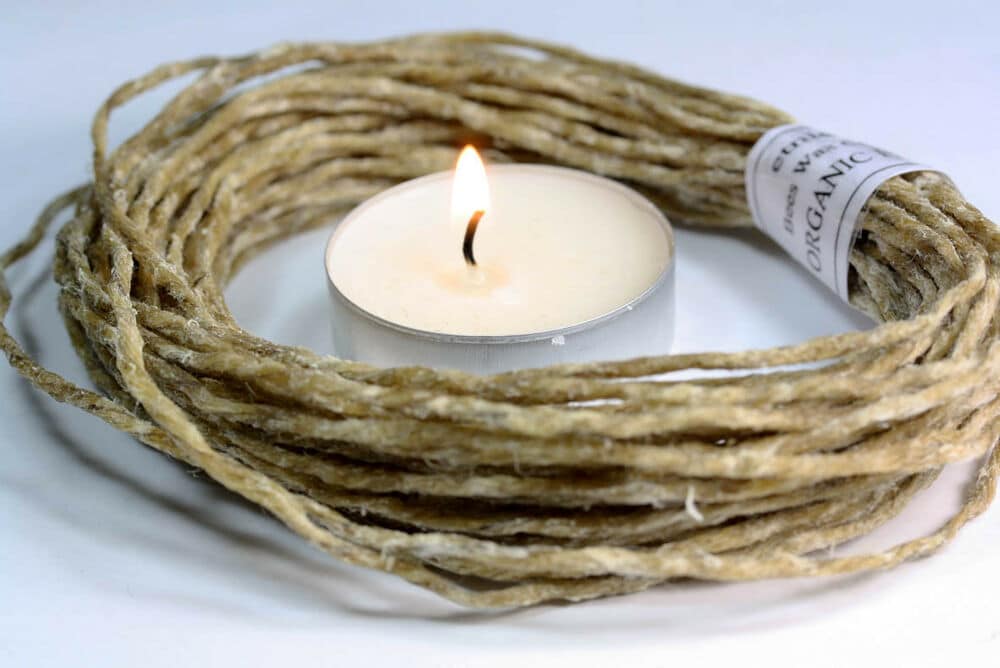
You can also find wooden wicks and those which are made of any fiber like hemp. You can even use old cotton shirt scraps or shoelaces with the plastic ends removed.
How Many Wicks per Candle?
For any candle under 3.5 inches in diameter, you can just use one of your wicks. After you hit 4 inches in diameter, add a wick per inch. A 4-inch candle gets 2 wicks. a 5-inch candle needs 3. Keep this up for whatever size of candle you decide to make with your homemade wicks.
Thicker wicks burn hotter and can melt a wider pool of wax. There’s no harm in adding extra if you want to be sure your candle melts evenly. Well, maybe make sure they won’t join together to make a huge flame.
Why Trim Candle Wicks?
The main reason to trim candle wicks is so you get a longer burn time and less soot. A wick that is too long can’t draw wax up to the end and so the wick itself begins to burn rather than the fuel.
This produces soot and a less clear flame. If you want a cleaner jar after you finish burning your candle, make sure you keep your wick trimmed to 1/8 of an inch. We recommend reading our guide on how to clean candle jars.
Supplies Needed
Now, it’s time for our supplies. For the first set of instructions, you will need the following:
- Hot Water
- Salt
- Borax
- Cotton Thread like Butcher’s Twine
- Measuring cups and spoons
- Scissors
- Ruler
- Mixing Sticks
- Beeswax – Pure or Synthetic
This will give you a candle that burns well. You can use any pure cotton thread you like, but you should braid or crochet it so it is decently thick. A thicker wick burns hotter.
Technically, you just need wax to make a wick. However, the salt and the borax wick will burn better.
For a wooden wick you will need:
- Wooden Sticks
- Oil such as olive oil
- A way to attach them to the bottom of your candle jars
One thing to note is that any wood you like can be used. You can normally find balsa sticks at craft stores, but wooden popsicle sticks work just as well.
As for oil, use pretty much any cooking oil you like. Olive oil is frequently mentioned, but coconut or whatever you have on hand works so long as it is a liquid or will melt. You may not want to use butter or lard since they can spoil and smell.
You will also need some way to attack your wicks to the bottom of your mold. There are clips meant for wooden wicks that you can reuse, or you could just hot glue it down. The tutorial I will be linking uses hot glue. If you plan on selling the candles, I advise using the proper clips.
How to Make a Cotton Wick for Candles
Credit to Environ Molds on YouTube
Step 1. Measure and cut your wicks
Use your ruler and scissors to cut your wicks. If you know what size of a mold you will be using, you want a few inches longer than the mold.
If you are using a jar, you want at least an inch above the top so you can secure your wicks. If you don’t have candle molds, you can make them yourself using our tutorial.
Pro-tip: Loop your thread over as you measure it. Then cut the loops so you can make a bunch of wicks at once.
Step 2. Measure your water and make your solution
Measure out 1 and a half cups of hot water or 355mL. Add 2 tablespoons of salt and 4 tablespoons of borax powder. Mix until dissolved with your stir sticks.
Pro-tip: Keep borax away from pets and children. It can be toxic if ingested.
Step 3. Soak your cut wicks
Place your wicks into the borax solution. Leave this for 24 hours to soak.
Step 4. Remove the wicks and give them a quick rinse
Once you remove your wicks, you will notice a slight coating of crystals. This is normal, give your wicks a quick rinse in clean water to get rid of these crystals.
Pro-tip: You may be tempted to skip this step. You shouldn’t, since the crystals won’t burn.
Step 5. Dry your wicks
Lay your wicks out to dry. You can use a plastic clothes hanger, or paper towels to let your wicks dry. Leave them for 48 hours.
Pro-tip: Don’t use metal hangers since the metal can leave rust stains on the wicks.
Step 6. Coat your wicks in wax
The next step is what will stiffen your wicks so they stand in your candle mold. It also helps them burn better. You need to melt your soy wax and pour it into a dish with your wicks to coat them. Let this first coat dry, then pour more wax and let it dry again. You can repeat this to get stiffer wicks if you like.
Pro-tip: Beeswax is the best to use if you are making beeswax or natural wax candles due to the low melting point. You can also use the same wax you will be making your candles out of. Just make sure the melting point is the same or lower than your candle wax.
That’s it! Use your candle wicks like any premade wick you can buy from the store. Just be sure to trim them down in your finished candles.
How to Make Wooden Wick Quickly
Credit to Lily Rose on YouTube.
Step 1. Pick your wooden wick
Pick any wooden stick you like. Popsicle sticks and cheap and easy to find. Many craft stores sell stips of balsa wood that are easy to trim to the size you need. Any wood that can be safely burned is fair game to make a wick out of.
Just make sure it’s fairly thin so it will burn more easily. You could trim your sticks now if you know what container or mold you will be using. Otherwise, just trim as you need them.
Pro-tip: If you are using a container that is longer, a longer chip of wood could be used as a wick. Some store-bought wood wick candles do this rather than use multiple wicks.
Step 2. Pick your oil
Pick a nice oil to use. Olive works great, or coconut. Just make sure your oil is liquid so it will soak into the wood.
Pro-tip: You can use any oil. A scented oil could add to the fragrance you will put in your candle. You could also theoretically use bacon fat to get a bacon scent.
Step 3. Soak your wood
Place your wooden sticks in a shallow dish and pour the oil over them. Make sure they are completely covered in oil. Leave this to soak for at least an hour.
Pro-tip: Leaving the wood to soak longer gives better results.
Step 4. Pat the excess oil off
Remove the wicks and wipe them off with a paper towel to remove the excess oil. You could also put them on paper towels to air dry.
Pro-tip: Your wicks should feel a bit oily but shouldn’t leave any oil on your hands after you handle them.
Your wicks are now ready for use! You can trim them now to be just slightly longer than the top of your wax will be. I would wait until after you pour the candle since you don’t want to risk losing your wick in the wax.
You will need to secure these wicks to the bottom of your candle since they will try to float away. You can use wick clips made for wooden wicks. The tutorial here just used hot glue to secure them in the jars.
Learn more about wooden wicks here: https://thewaxcandles.com/how-to-make-wood-wick-candles
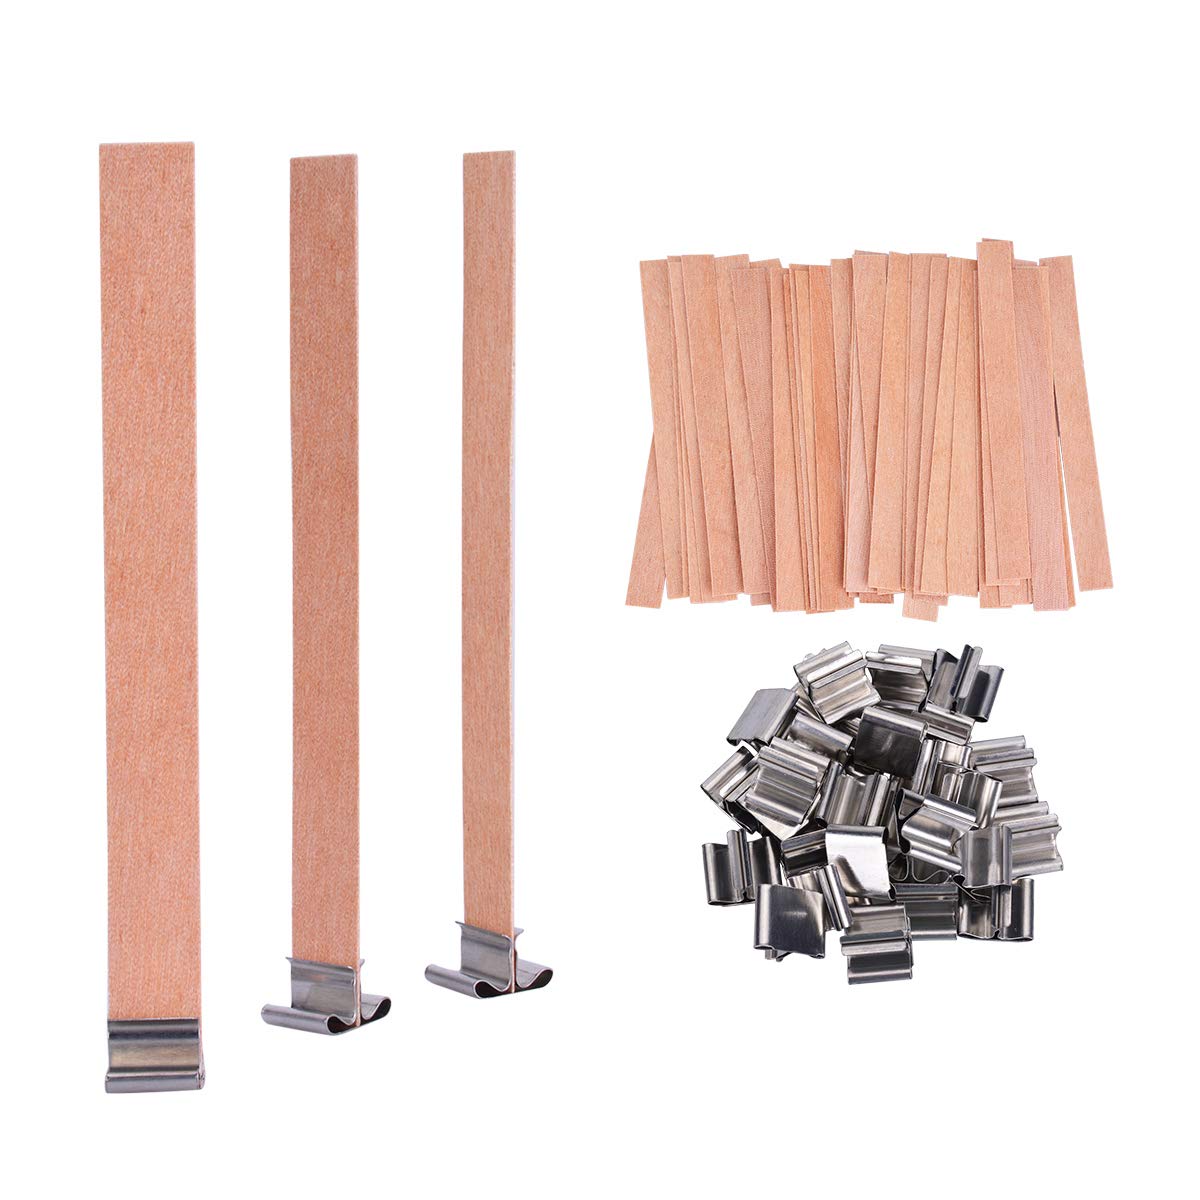 YoungRich 100 PCS Wood Candle Wicks
 - Length: 13*1.3cm (5.1 * 0.5inch) / Weight: 7,13 ounces
- Premium wood 100% cotton 1.5mm
Final Thoughts
I hope you enjoyed this tutorial. Personally, I love not spending money on wicks that could be used for wax. If you found this helpful, please share this tutorial with your friends.
If you have any thoughts on the article or helpful tips, please comment down below. Thanks for reading!
Carole Brooks has been making candles for many years. She loves to create candles of all different types and for all different purposes. Here she shares her experience and knowledge. Carole is a graduate of Texas A&M University.
")


")


Thanks! Now I can make my own wicks!
Great
How long does it burn for
Thanks!
The wooden wick can burn for up to 50 hours, depending on the size of the candle