
Candle making is a delightful blend of art and science. It provides an avenue to express creativity and offers endless possibilities in terms of shapes, colors and fragrances. However, beyond the artistic aspects, successful candle making requires a basic understanding of the scientific principles involved. Various factors such as the type of wax, wick, temperature, and additives used can greatly affect the quality of your homemade candle, especially how well it burns.
While making your own candles can be a satisfying and rewarding endeavor, encountering problems such as candles that don’t burn properly can be a bit discouraging. This article aims to shed light on some common reasons for this problem and offer solutions to ensure that your homemade candles burn beautifully and efficiently every time.
Understanding the Components: Wax and Wicks
Every candle consists of two essential components: the wax and the wick. The wax serves as the fuel for the flame, while the wick delivers this fuel by drawing up the melted wax, a process known as capillary action. When the heat of the flame melts the wax around the wick, the liquid wax is drawn up into the flame where it reacts with the oxygen in the air to produce heat, light, water vapor, and carbon dioxide.
Choosing the right type of wax and wick for your candle is crucial for a proper burn. Different types of wax, such as paraffin, soy, beeswax, or coconut, have distinct properties, including melting points, fragrance throw, and burn time. Similarly, wicks come in various types, sizes, and materials, each with different burn characteristics.
1. Wick Size & Length
Whether you opt for a handmade or store-bought candle, the size of the wick is fundamental to ensure it will burn properly. Going too big with your wick may cause an overbearing and powerful flame.
Not only is a candle wick aesthetically pleasing, but if kept at an optimal length and thickness, it also helps to prevent black smoke production as well as uneven burning through the wax.
If you opt for a too short of a wick however, your flame will likely not stay lit very long before extinguishing altogether – wasting your precious scented candles!
To achieve a smooth surface, carefully trim the wax away from the edge of your candle. Although it may seem like an easy task at first glance, this job can quickly become overwhelming!
Establishing the diameter of your desired container or jar will dictate what size wick you’ll need. Even though most wicks come with a radius description, it is still essential to test them for accuracy.
With a wide range of waxes and fragrance oils to choose from, you need higher temperatures when your scent has high flashpoint and specific gravity. On the other hand, if it’s low in these two areas then a smaller wick is sufficient.
2. Wick Not Trimmed
Don’t be afraid to trim your wick! Though you may have read about how the size of a wick affects candle burning before, it could also contribute to why yours is not burning correctly.
Despite this fact, many individuals are hesitant to cut their wicks because they assume that it’s an extraneous step.
However, if you want the best burn, you’ll need to trim.
- If you don’t, and your wick isn’t the appropriate size or thickness, you may have tunneling (which we’ll talk about later), or your candle won’t remain lit.
- If you’re using a professional wick, there’s usually no need to trim it before the first burn.
To maximize the burn time of your candle, trim it every few hours right after lighting.
Carefully snuff out the flame and allow your candle to cool down before cutting off 1/8″ wick using a wire cutter or nail clipper – scissors can also work but be cautious as they may slip!
3. Drowning in A Puddle of Wax
Drowning candlewicks were stated before, but your wick might drown for various reasons.
There are a few reasons why your candles may be tunneling – like adding too many additives, using an undersized wick for the container, or filling with wax past the recommended level. All of these issues can cause trouble with candle burning!
The solutions to these issues are rather simple.
- You alter the right amount that is indicated if you are employing too many additives.
- If you’re uncertain of the appropriate wick size for your container, refer back to our sizing guide in the earlier section.
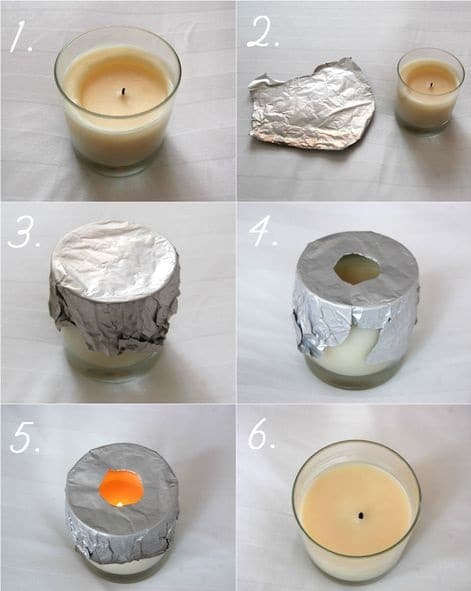
- However, if it’s too late and your candle is already melting away without burning down properly, never fear! Simply absorb any liquid wax with a paper towel.
If you don’t fine-tune the wick, this will only provide a short-term fix; then again, your problem won’t be addressed.
4. Tunneling
Tunneling is a common difficulty encountered by all candle lovers, even with the best of materials and craftsmanship. It occurs when the wick fails to acquire enough oxygen – consequently it sinks into the wax and douses the flame, forming an indent in its center resembling a tunnel shape.
The harder it gets trying to light this kind of candle because its flame channels down as if being directed through that same central passageway. An unfortunate consequence for those who invested their time or money into creating something special for others or themselves!
If you run into this situation, a few options are available. Мore information Here.
5. You Are Lighting Your Wooden Wick Incorrectly
If you used a wood wick in your DIY candle, you’d need to ignite it differently from the others. You’ll likely have to try multiple times before it starts to burn. So don’t be concerned.
The heat from the wick will need to pull some wax through the wooden wick before it starts to burn smoothly. Try it one at a time; the lighting and burning will become simpler as you go.
6. The Wood Wick Is Excessively Long
In addition to the risk of flooding, an overly lengthy wick can also impede your candle from lighting or burning correctly. This issue is unique to you if you’re using a hardwood wick. It will also not burn if the trim is required to remove the burnt material.
Always remember that the wax, not the wood, is responsible for the candle’s flame. The wick of the wack is drawn upwards by the flame. As a result, if the wick is not properly trimmed and maintained short, the wax will not reach the flame.
7. How the Wrong Wax Composition Can Affect Your Candle’s Burn
Another factor that can affect how your candle burns is the composition of the wax. Some waxes, such as paraffin, have a high melting point and require a larger wick to create a large enough melt pool. Other waxes, such as soy or beeswax, have lower melting points and work well with smaller wicks.
If you’re using a blend of waxes or adding additives such as colorants or fragrance oils, this can further affect the burning characteristics of your candle. For example, too much fragrance oil can clog the wick and hinder its ability to draw in wax, resulting in a weak flame or a wick that drowns.
8. The Crucial Aspect of Correct Pouring Temperature
The temperature at which you pour the wax into the candle mold or container can also affect how well your candle burns. Pouring the wax at too high a temperature can cause the wax to pull away from the sides of the container as it cools and contracts, leading to problems like tunneling or an uneven burn. On the other hand, pouring at too low a temperature can result in a rough or bumpy surface, which can affect the aesthetic quality of your candle.
It’s generally recommended to pour most waxes at around 130 to 140 degrees Fahrenheit, but this can vary depending on the specific type of wax you’re using. Always check the manufacturer’s instructions for the ideal pouring temperature for your chosen wax.
9. Fragrance Oils and Dyes: How They Can Influence Candle Burning
While fragrance oils and colorants add a personal touch to homemade candles, they can also affect the burn if not used properly. Excessive amounts of fragrance oil can clog the wick, inhibiting the capillary action necessary for the wick to effectively draw up the melted wax. This can result in a weak flame or a flame that self extinguishes.
Similarly, certain colorants, especially darker ones, can raise the melting point of the wax, potentially requiring a larger wick to achieve an adequate melt pool. Understanding how to use these additives effectively can enhance the aesthetic and aromatic appeal of your candle while ensuring proper burning.
Conclusion
To sum up, it’s easy to get pulled into the pleasurable process of trying out different candle smells when manufacturing them. The processes of wax melting and cooling are fascinating. Because of these characteristics, many people find it simple to skip through the wick-placing stage of the procedure.
The wick looks like frosting on the cake, and it’s a simple finishing step. It is, but skimming through it based on what we’ve learned might be frustrating after a fantastic candle-making experience.
Make sure your wick is the proper length, and think about the material and type of wick you want to use. Also, figure out what wick proportion and size to utilize for the size of the candle you’re producing. Finally, give that initial burn some time and patience.
Carole Brooks has been making candles for many years. She loves to create candles of all different types and for all different purposes. Here she shares her experience and knowledge. Carole is a graduate of Texas A&M University.


")