
Did you know that people spend $5 billion a year on massage candles? How many of those were homemade? If you are looking for an easy way to make your own, this article is for you. Massage oil candles can be made at home with just a few ingredients and some time, and we will walk you through the process from start to finish so that anyone can do it!
What are massage candles?
Massage candles are a great way to add variety and aromatherapy benefits to your massage sessions. Candles can help make the environment more relaxing, reduce stress levels in both you and your client, and provide relief from pain by using essential oils that are effective for this purpose.
How they work is simple: light them up before or during a massage session, so their soothing aroma fills the room. DIY massage candles are like other candles. The oil becomes a warm massage. You can pour it directly on your skin.
These are what people call candles, but they are made of oil. Once you light the oils, they melt at a warm temperature. You can then pour them and use them to rub them onto your skin. It has a nice scent to it.
What You’ll Need
- High-quality soy wax
- Glass or aluminum containers / Round Tins
- Proper Size Candle Wick
- Coconut Oil, Olive oil or vitamin E or Shea Butter, jojoba oil, or Almond Oil
- Skin-safe essential oil or skin-safe fragrance
Video Guide
Step 1: Insert the wick
If you have pre-made wicks with sustainers already attached, skip this section.
Please measure the length of the wick so that it sticks out at least 1/2 inch from your candle container’s bottom. The raw wick should only be made from natural fibers and used in soy wax candles.
You should purchase a larger wick than the container you have to burn your candles, and this will ensure it burns more quickly and creates a wax pool faster than a smaller one.
Once the lengths have been cut, insert the wick into the hole of the metal sustainer with a wooden knife. You can choose either standard size or a slightly larger sustainer to hold the wick in its place.
Slide it down to ensure that the wick does not stick out of the bottom. Use pliers to secure the wick in place by pressing the metal feed at the top of the sustainer with your fingers.
Step 2: Melt the oils
Heat the butter, sweet almond oil, soy wax, and honey in a saucepan on low heat until completely melted. This is best done in a double boiler, but it’s possible to heat directly on a stovetop if you are watching and stirring constantly.
You can use natural wicks you have made yourself. Once the oils have melted completely, remove the pan from the heat and allow it to cool. The oil must cool to 130 °F/54 °C before you add the other ingredients. Please continue to the next step while it cools.
Step 3: Get the containers ready.
Use the wooden chopsticks to center your wicks in your containers. If you have used raw wick, and it has been in oils, take them out using a spatula to extract any extra oil. Wear vinyl gloves or latex gloves if you touch the wick with your fingers.
Step 4: Add the oils and Vitamins
Add the essential oils and the vitamin E. Stir until everything is well combined. The combination of Rose-Geranium & Palmarosa creates a beautiful, relaxing atmosphere.
After the essential oils have been mixed in, use the spatula gently to pour the oils into the containers. To push the wick back in place if it moves during this time, you can use the wooden skewer. Allow the candles to cool for 12 hours.
Step 5: Finish
When the oils have hardened, and the containers are no warmer, trim the wick. Use a pair of scissors to cut the wick flush to the top of the container.
Use a dry, clean cloth to wipe the lids and tins clean. Then you can fit the pieces together. It can be decorated with a ribbon, or you can go all out and make labels.
How to use Massage Oil Candles
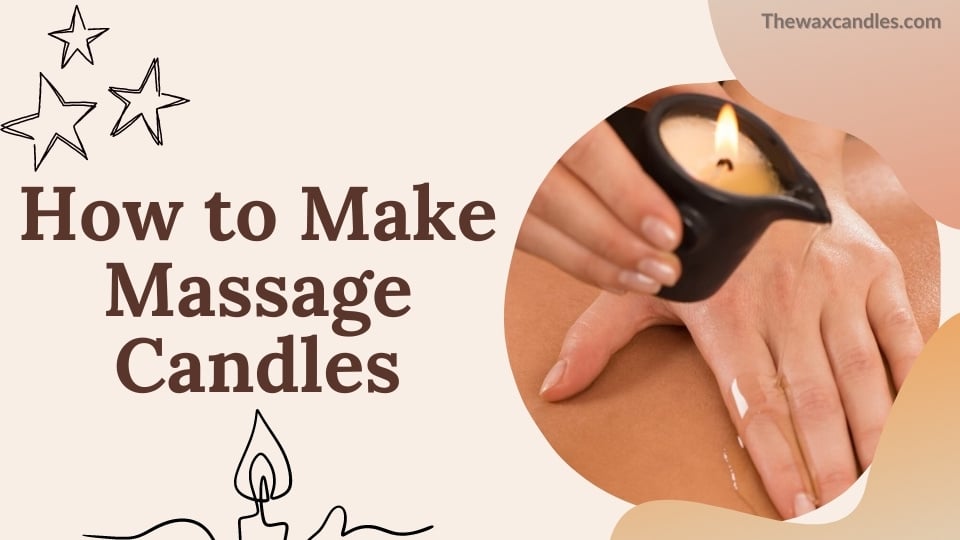
Light the candle and allow it to burn for between 5-15 minutes, or until there is a substantial amount of warm oil. The essential oils’ scent will fill the air during this time.
Now, blow out the flame. Take the oil, put it in your palm, and massage the skin. You’ll be amazed at how warm the oil feels the first time you try it.
You should be aware that the candle can heat up if left burning for longer than 30 minutes. Take care when you pick it up. Also, make sure the oil temperature is not too high.
How are massage candles useful for you?
- Using massage candle oil is more pleasant than having cold oil on your skin. It helps to relax your muscles.
- Hydrates and conditions your skin. It has ingredients that soften the skin.
- A house can smell good if you put in candles.
- Soybean oil has things that help your skin. It is rich in linoleic acid, antioxidants, and vitamins good for your skin. Soybean oil also helps with the recovery of the skin barrier.
- Shea butter – Shea butter can make skin smoother and make you look younger. It also has anti-inflammatory properties, which are suitable for your skin.
Important! Do not put the wax inside your body. It is not lube and should not be used that way.
Sources:
Carole Brooks has been making candles for many years. She loves to create candles of all different types and for all different purposes. Here she shares her experience and knowledge. Carole is a graduate of Texas A&M University.
")
")
")
")