
Do you struggle with fragrances, scents, and candles because of allergies or being highly sensitive? Are you running a candle-making business but you want to provide an array of options when it comes to selecting the preferred wax type of your customer?
Have you considered using beeswax in your candles, but steered clear of moving away from anything other than standard soy and paraffin wax? If you answered yes to any of these questions, this tutorial may be just right for you. Learning how to make beeswax candles is surprisingly simple and not too different than when working with traditional soy and paraffin wax varieties.
Whether you are interested in using beeswax to help with protecting against allergies while providing a hypoallergenic option in your candles or if you are simply looking for additional health benefits, opting for beeswax candles provides an array of advantages and can be implemented in your candle-making business in no time.
Why Use Beeswax When Making Candles?
Using beeswax when making candles of your own is not only a way to enjoy fresher and cleaner air through the process of ionization, but it is also a way to appeal to a much wider market if you are in the business of making and selling your very own candles. Some of the benefits of using beeswax at home.
Hypoallergenic and Non-Toxic
Do you struggle with allergies or do members of your household struggle during the springtime or with foreign scents and fragrances? Are you looking for a way to sell candles to those in the market who are allergic to most scents or sensitive to various fragrances that are already widely available?
Using beeswax to create candles is one of the best ways to break into the organic and eco-friendly marketplaces, even if you are doing so locally or as a way to connect with your own family members and friends.
When correctly sourced, beeswax is 100% natural and organic and offers a hypoallergenic and non-toxic option for people who want to enjoy candles and fresh aromas without experiencing sniffles, sneezes, or allergic reactions.
In addition to helping those with allergies and allergens, beeswax candles are also approved for those who struggle with lung issues, including asthma.
Affordable
Even if you are not familiar with working with or using beeswax, it is important to keep in mind that it is relatively easy to get started with and also extremely affordable. Rather than paying a premium to purchase a beeswax candle in a massive store, you can opt to create a bundle of your very own candles for just a few dollars. To get started, a standard beeswax candle kit is approximately $30 USD, providing you with plenty of wax and ideas to get started.
Negative Ions
With a process of ionization, enjoy fresher and cleaner air. Thanks to beeswax and ionization, anyone who lights a beeswax candle can reap the benefits and luxuries that beeswax has to offer with its negative ions.
Due to the negative ions that beeswax contains and gives off, you can also enjoy a natural room deodorizer which is not provided in standard candles that are scented with fragrances and toxic substances at times. Beeswax can also help to neutralize odors in their tracks.
Less Residue
Are you guilty of lighting candles non-stop and cleaning your walls and surrounding areas from soot and other buildup or candle debris? Well, look no further than beeswax candles. Using this candle is much easier and cleaner, even if you use multiple candles throughout your home simultaneously.
Beeswax candles have been shown to burn not only much brighter than traditional and standard candles that are found on the market today but also much cleaner, providing you with a cleaner and healthier environment and atmosphere altogether.
Natural Fresh Scent
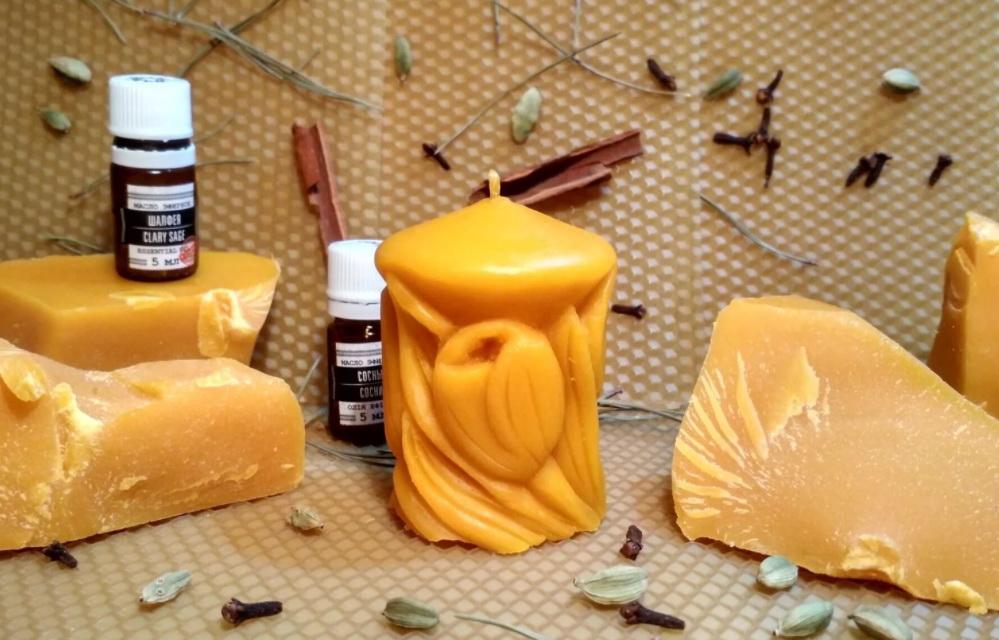
Instead of using extremely fragrant and sometimes toxic scents, choosing to use beeswax is a way to take advantage of an all-natural fresh scent. Instead of adding additional scents and fragrances to your beeswax candles, you can leave them simply as is to enjoy a slightly sweet and refreshing scent that does not trigger allergies or reactions, even in the most highly sensitive individuals.
What You Will Need to Get Started With Making Beeswax Candles
Whenever you are thinking of making beeswax candles, it is important to gather basic supplies and materials to ensure you are fully prepared for the project ahead, such as:
- Beeswax (which can be purchased in bulk and also in bags)
- Scale for weighing beeswax for mold-pouring purposes
- Candy or food thermometer
- Melting pot or saucepans
- Water and stovetop
- Silicone candle mold(s)
- Candle Wicks and wick stickers
Finding the Right Beeswax
Once you make the decision to create beeswax candles, it is important to seek out beeswax that is pure in nature and without any fillers or additives, especially if you have allergies or if you are looking to provide a hypoallergenic and sensitive candle option for customers and clients.
Whenever you are in the market for bulk or wholesale candle-making beeswax, it is imperative to research and review any additional ingredients or additives that are also included in the beeswax from the manufacturers of your choice.
Read reviews and testimonials from real clients to determine which manufacturer and supplier of beeswax are most authentic and organic based on your needs, your objectives, as well as your budget.
Measure
Always measure out the amount of beeswax you intend to melt before you begin the process. You can measure out your beeswax in its hardened form by using a standard kitchen scale. Additionally, you can also purchase beeswax to use for candle-making in separate bags based on the weights you intend to use each time for a more accurate measurement.
Research guides and view community videos and tutorials to learn more about how each brand of beeswax you are interested in will translate once melted to determine how many molds you will require for your pour. For a simple pound of traditional paraffin or soy, you will have enough melted candle wax for approximately 92 standard clamshell molds.
Setting Up Molds With Wicks
Place a wick sticker at the bottom of each of the candle molds you are interested in using with your melted beeswax. Placing wick stickers as well as the wicks you intend to use ahead of time is highly advisable. When wicks are already in place once you have melted your beeswax, you can immediately begin the pouring process.
If you need to place wicks individually as you pour, your wax is more likely to harden or cause you more trouble than if it were hot and immediately poured altogether. Ensuring your wicks and wick stickers are in place ahead of time is a must when you are pouring in bulk or pouring for customers and clients.
Set Up Your Double Boiler and Melt Your Beeswax
Once you feel confident with your measured out the beeswax, you can begin setting up your double boiler. A double boiling method is used in the culinary arts when melting various items from chocolate to cheeses. With the double boiler method, two pots are used, one with boiling hot water beneath the other that holds the food or item(s) that require melting.
Using the double boiler method is one of the best ways to help with melting items such as chocolate, cheese, and even beeswax.
Begin by bringing half of a large pot to a rolling boil. Place another smaller pot on top of the water once it is boiling. Add the beeswax to the second pot, making sure it is not in contact with or near the water.
Allow the wax to begin melting while keeping an eye on the water level as well as the overall heat.
Use a candy thermometer to periodically check the temperature of the beeswax you are melting throughout the process. The optimal temperature will read approximately 175 degrees Fahrenheit once the beeswax has been thoroughly melted to the appropriate pouring and set point.
Once the beeswax has completely melted, remove it from the heat to pour immediately.
Tip:
It is important to note that beeswax is potentially flammable. Always keep an eye on the overall temperature of melted and melting beeswax to prevent and avoid any fires. Remove from heat immediately if you notice that your beeswax is beginning to smoke or if you believe it is catching fire.
Pour Your Beeswax Molds
Immediately after removing the beeswax from your heat source, you can begin to pour the beeswax into your preferred candle molds. Allow your beeswax candles to sit and harden until they are complete.
Read about how to make your own candle molds in this article.
Conclusion
Creating beeswax candles provide numerous benefits and advantages without additional fuss. Whether you are new to making your own candles or if you are in search of a new way to appeal to a more environmentally-friendly consumer base, beeswax candle-making is one way to get started that is sure to deliver on its return.
Do you enjoy the natural scent of beeswax candles? Have you ever used natural essential oils in your own candles? What benefits do you enjoy most when it comes to beeswax candles and candle-making in general? Let us know your own experience with beeswax candles in the comments below! A source: www.brambleberry.com
Carole Brooks has been making candles for many years. She loves to create candles of all different types and for all different purposes. Here she shares her experience and knowledge. Carole is a graduate of Texas A&M University.
")
")
")
")
Thanks. Wonderful video. Informative and good guidance.